I wanted to share a link to a lot of patterns for appliques. These are made by someone else and asks that you do not use them for re-sale purposes, just for personal and gift purposes. But I wanted to share. You cilck on the link to the octopus or rocket and it will take you to a bunch of appliques. I did not create these, just wanted to share for others, please respect the owners wishes to only use them for personal uses.
Monday, August 22, 2011
Car Organizer

One thing that I have learned since being a parent is that it is almost impossible to keep your vehicle clean. I am always hearing it from Bob that I need to clean mine. Even though I keep a bag for toys, they still end up everywhere. Plus the distraction of a little girl asking me to grab things while driving down the road. I figured it was time to make some sort of organizer. I got the idea from here, but just sort of made it up as I went. So you have a few options of patterns.

You need to find a fabric you want for your backing. I used a purple linen. Then the fabric you want for your pockets. I picked a decorated lycra, so I also used binding so it would not stretch too much. If you use cotton you shouldnt need the binding. So here is the list (you can adjust as you need to. If you like where I made the pockets use these sizes, if you want your to be a different sizes or places just adjust that):
2 - 17"x25" of the fabric you want for the back. (I measured the back of my seet to get these sizes)
1 - 17"x25" of fusable interfacing.
2 - 2"x6" in the backing fabric (for tabs to hang organizer from)
1 - 17"x10" Lycra piece (bottom pocket)
1 - 17"x5.5" (top pocket)
2 - 6"x7" (center pockets) I decided to use a contrasting cotton fabric.
22" elastic

Take one of your back pieces and adhere the interfacing to the wrong side of it. This will be the piece you put all the pockets on.

Take your two 2"x6" pieces. Iron both in half, then fold each side to the center. The top one is done, the bottom one is showing the process. Once they are ironed, top stich over them to hold them closed.

Take both of your lycra pieces (17"x10" and 17"x5.5") and top stich your binding to the top long side of them. If you decide to use cotton (much easier to work with than lycra) just hem the top side.

For the top pocket put the right side of the lycra to the right side of the linen and measure down 7". Pin and stitch the pieces together.

The bottom one will be stitched together later on. Place the wrong side of the lycra to the right side of the linen. I knew I wanted a side pocket that was 5" from the right edge. So I just did a straight stitch there to hold the lycra to the linen.

Measure in 4" from the edge of the top of the linen. Pin and sew your hanging tabs on here. You should measure your vehicle seat to see if you need to adjust how far in the tabs are.

I wanted my top pocket to have 3 different pockets. I did mine at 4" and 8" in from the edge. Just pin in those places and do a top stitch going vertically on the pocket to separate them.

Now its time to make the cotton pockets. I decided to use the cotton becaues I wanted a couple small pockets that were sturdy. There are a few ways to do them, but this is how I did this time. Using your iron fold down the top of the cotton 1/4" then another 1/4". Top stitch over those to hem the top.

Then fold in the two sides of the pockets 1/4" and iron.

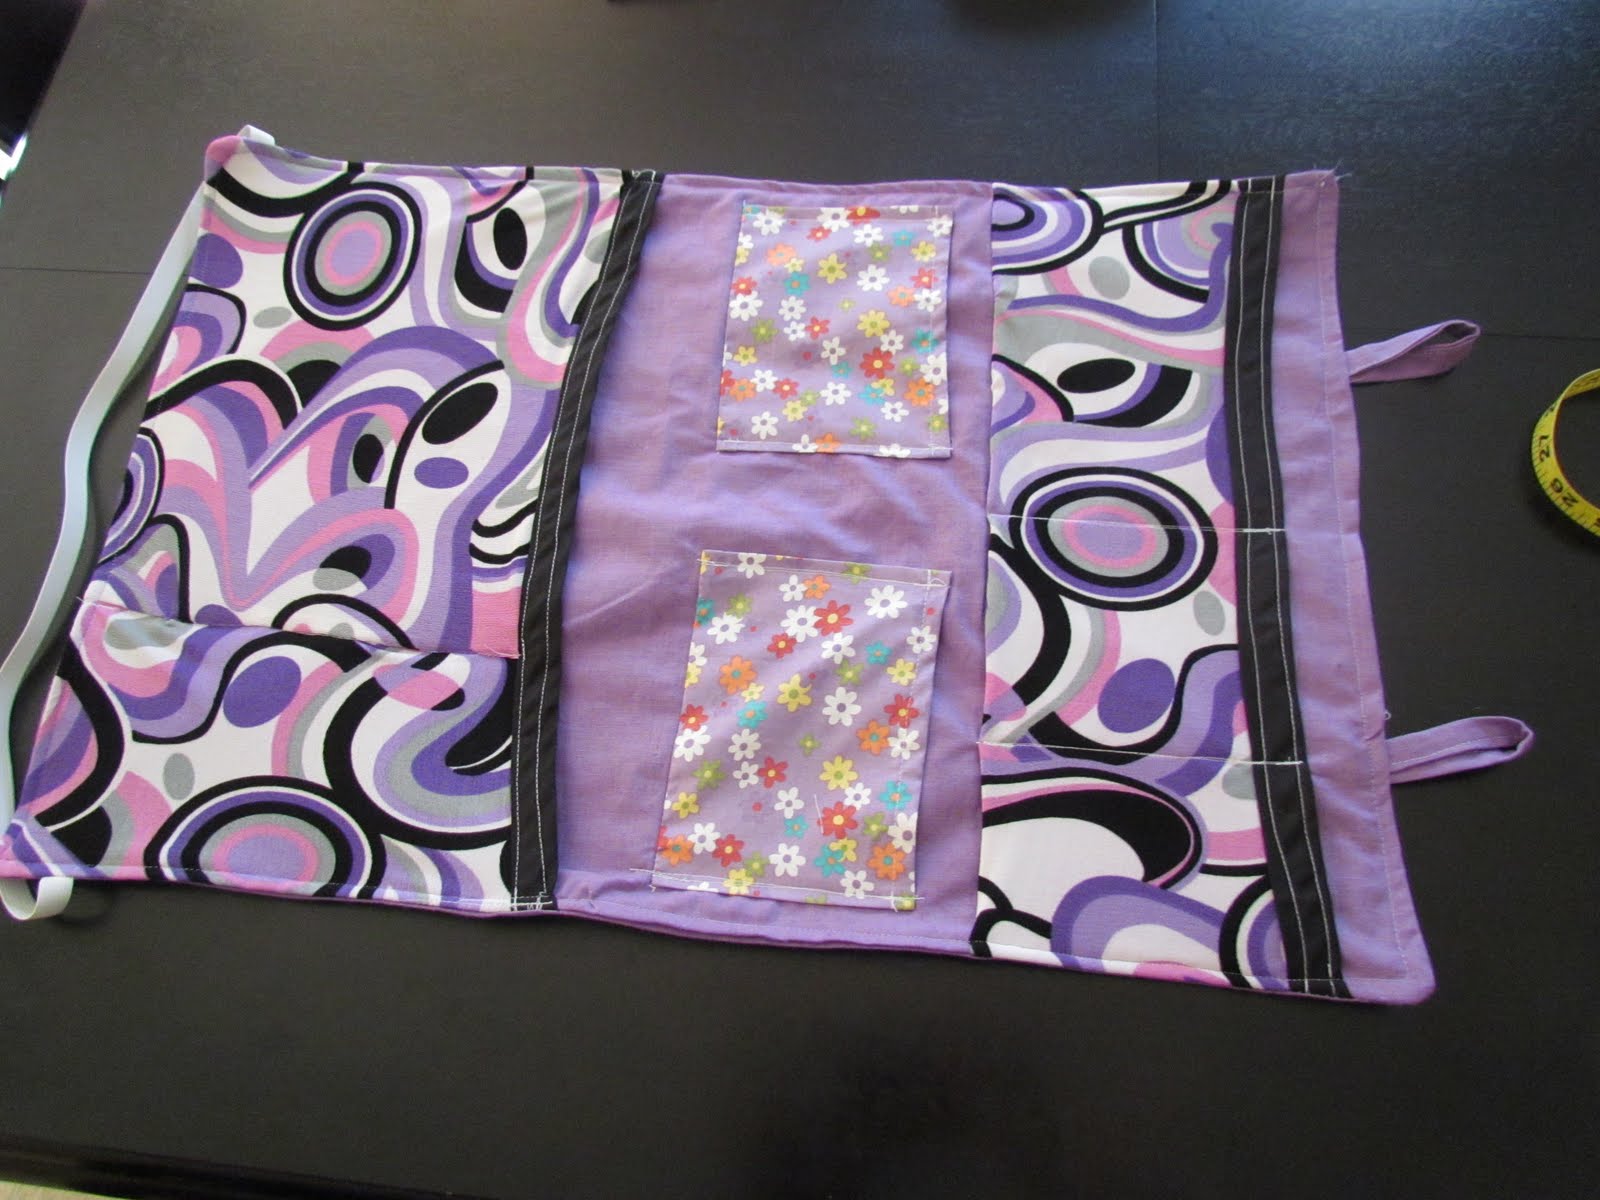
Sew those pockets on by putting right sides together of the cotton and linen. Meausre where you want them to lay. I went 6" down from the top pocket. Stitch the botth of both pockets. Then fold them up and do a top stitch along both sides. It will look like the picture above.
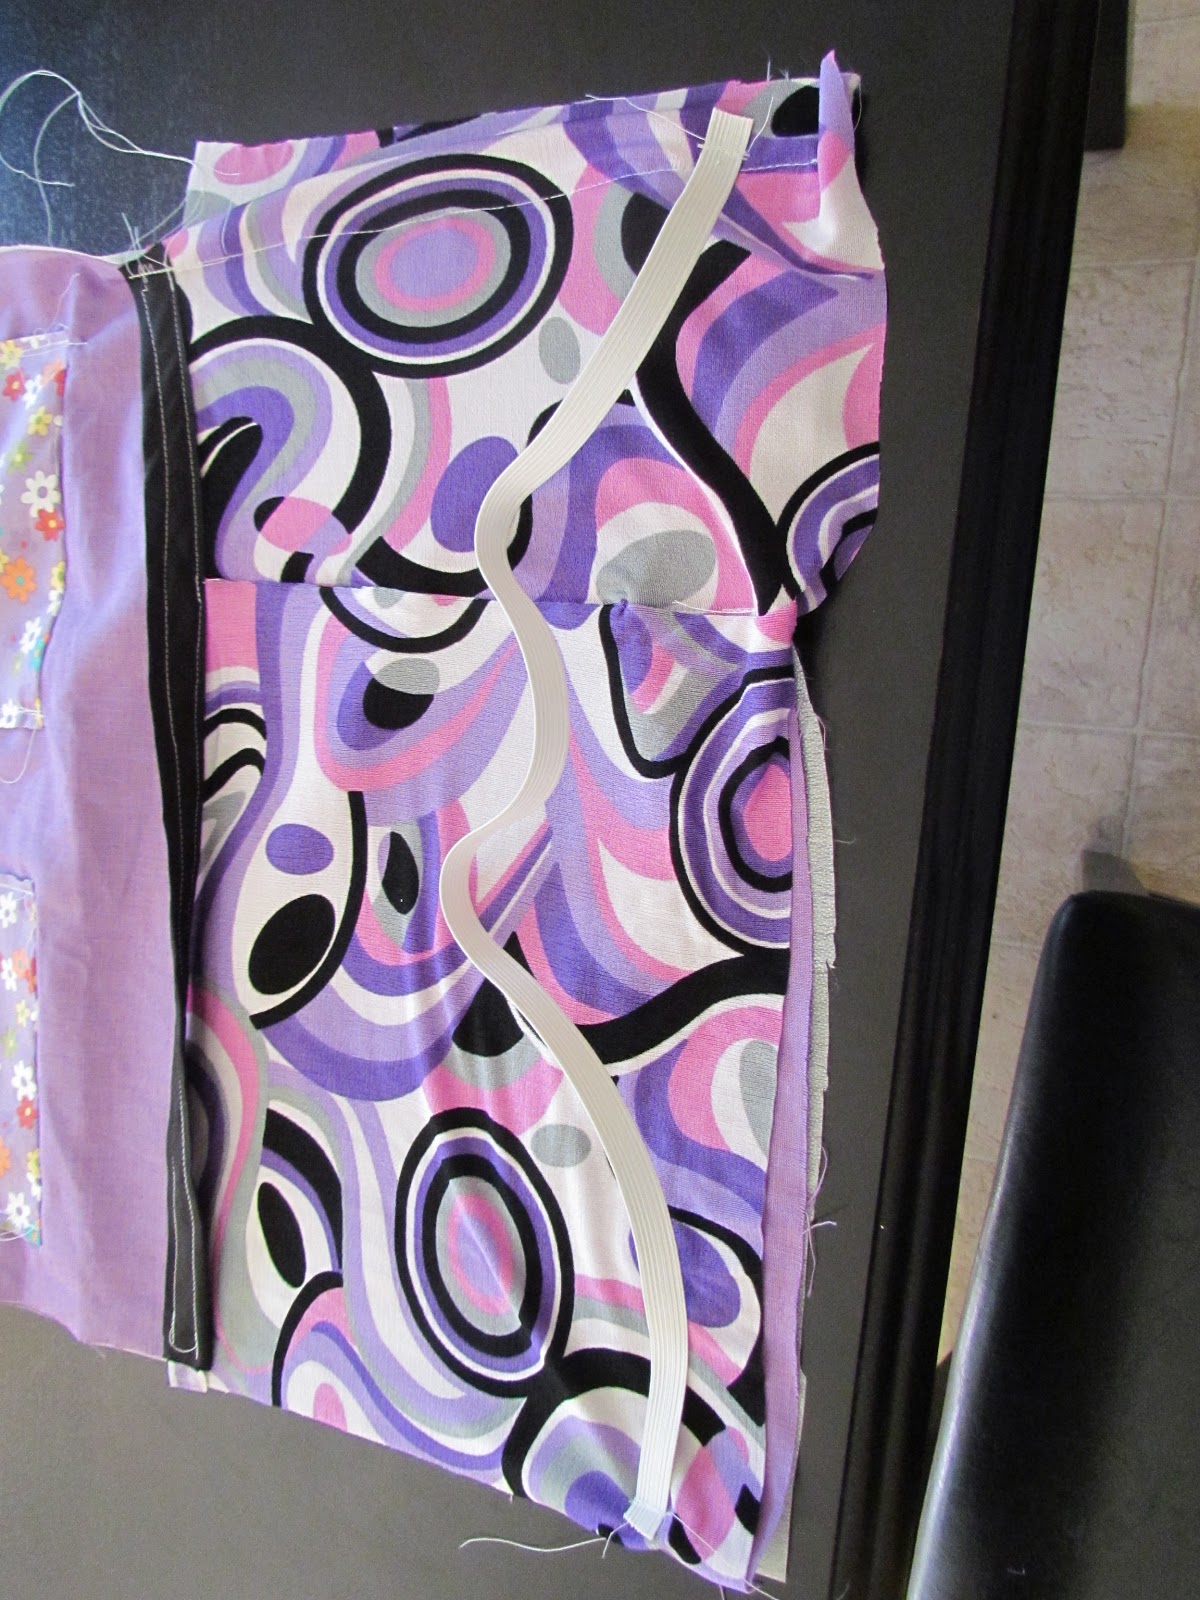
Now its time to attach your elastic. This will keep the bottom of the organizer tight against the back of the seat. I meausred up about 1.5" from the bottom and then sewed the elastic to the top of the bottom pocket. Measure your car again to see where you should attach this. My elastic was also 22", again measure around your seat to see how long you want yours to be. You will want this to be tight.

I didnt take pictures of the next step, but put the right side of the other piece of linen towards the right side of the piece with the pockets. Pin them together, and stitch around the whole piece. Leave an opening so you can turn it right side out. I did a straight stitch, then a zig zag stitch. I left my opening at the top since the bottom had the pocket and all that. After you stitch it around trim off any excess fabric around the edges. Turn the piece rightside out, and push out all your corners. I find that chopsticks work great for this. You will then have the above picture. (note the elastic is folded to the back, and make sure your tabs are layed down when you attach them.
Now go around the entire piece and top stitch around the edge. This will close your opening at the top and make the organizer more secure.

Pull your elastic over the seat and push it into the opening where the back of the seat meets the seat part. I used a piece of ribbon to tie the top from tab to tab around the head rest. Make sure it is tight on there. You are now ready to fill it up with the necessary toys!

I made the bottom pocket larger so it could hold books.. The top should hold Alison's Ipod and sunglasses, adn then small toys in the middle pockets. I wanted to use the lycra becuase not only is it pretty but it will stretch with the toys. It will give Ailson a better chance to fit in those odd shaped toys (like dinosaurs) into the pockets. I am hoping this will help her keep everything picked up and my floors more organized!
Sunday, August 21, 2011
Hanging Mail Organizer

In the past year I have not found a good place in our house to keep mail organized. I hate putting bills in a drawer afraid I will misplace them. I was lucky enough to find this tutorial which was the answer to what I needed. She did such a great job explaining how to make this wall organizer that I did not feel any need to add to it or change anything. Visit her blog if you would like to make one of these for your house.
Monday, August 15, 2011
Big Rolls

These are my absolute favorite rolls. I hate sharing the trick, but since I always get asked I figured I would go ahead and share on my blog. If you don't follow my blog you lose out because these are the best. If anyone has ever visited Lambers Cafe, these are about as similar as you can make at home to their Throwd Rolls... Not the same, but similar... So here is what you use.

Rhodes frozen white dinner rolls. You can get these absolutely anywhere..

They are individually frozen, so just spray a muffin pan with PAM, and drop two frozen rolls in each. Losely place plastic wrap over these, make sure it is lose so they can rise.

Let the rolls sit for about 6 hours. To the point where you think that they have risen too much. These are actually just a little smaller than I like mine, but we ran out of time. I would not go any smaller than this.

Bake at 350 for 12-15 minutes until light golden brown.

Pair with your favorite meal and enjoy. We had smoked brisket so this is what inspired some good "home-made" rolls! Enjoy!
Reading Tent, Play Fort

I finally had a break this week to be able to make this reading tent/fort for Alison. I got the idea here, but since we know I hate paying for patterns, I thought "I can do that" and came up with a plan. What I got was a large (this one is 30"+ across) hula hoop. A pretty queen flat sheet, and a queen 40x80 sheer curtain. I also had a large button, elastic hair tie, 4 - 50" ribbons, and coordinating thread. Oh, and a hook to hang it from the ceiling.

So I did nto pin, because it was too much fabric, I went ahead and just started sewing. I took the long side of the sheet and folded it over about 3" and sewed a straight line.

I then went and did a zig zag, because I know this will bee stability. Just do one side of the sheet. make sure you fold it correctly so the right side will be on the outside and the wrong on the inside.

Now, decide what side you want the door to open on. I wanted it to open to the right, so I found that side of the sheet and put the right side of the sheet to the right side of the curtain and sewed down. Do not sew over the openings at the top. You will need those!

I also zig zag stitched down for security, leaving the top open. You will then sew down about 20" on the other side.. this will keep your fort together. Do not sew the whole length of the curtain, just enough to hold it closed, but you want your little one to be able to get in and out. Also, my curtain happened to be the same length has the sheet width. So I did not have to cut it at all and hem it. But you should measure them to see if you need to trim any curtain, and then hem the bottom.

This is what you will have when you are done attaching the curtain.

Here is my Hula Hoop. I tore off all of the stickers going around it because they were pretty lose all ready.

I was thrilled to see that this was just stapled together and had a plug.

I used a staple puller and pulled out the staple that was holding it together.. then I dumped all the noise makers that were inside in the trash. I double checked to maek sure they were not something I could reuse, but they were not.

Now feed your hoop thoough the top.

When you are done it will look like this. You will need to secure up the opening to make sure it stays in place.

I just used electrical tape. It doesnt look pretty but this will be hidden.

This is what you will now have.

Start attaching your ribbons. I did one ribbon on the openings on each side of the curtain. Use extra knots to make it secure, I left some hanging down because I thought it would look girly. This is where you do what you think will look best.

As you noticed I used different colored ribbons, again with all the color in this tent I figured that would look nice. For the two ribbons that did not have openings already I just used scissors to poke a hole through and tied the ribbons on. I tried to position them equally around the hoop, but there is some give because you can move them around.

Now figure out where to hang the fort. and put hook in the ceiling.

Gather your ribbons together and tie a very secure knott. You will do this where you want it to hang from.

Hang from the hook.

Now its time to attach your button and hair tie. This will be used as a way to hold the opening open. I tied the thread to the hair tie very tightly, then figured out where I wanted to put the button.

Start sewing on the button, you will want to have the hairtie on the other end and attach them at the same time. This will make it all secure.

hair tie sewn on with thread used to sew on button.

Now you can open the fort and keep it open.

I wanted something that would keep the fort open a bit, so I took two small nails and nailed them to the wall. I use this trick with curtains too. It will keep them in place without being obvious.

Here is the top..

And I added a matching bean bag on the inside. I think it might be just a little too small, but it will work :)

And you have a happy little girl!

Here is the finished product. With a larger pillow or bean bag at the bottom it would stay open more. The whole project cost less than $50. I was going to make a pillow, but found the bean bag for reasonable and decided to just go with that. You can do this in any color and design, be creative! These are great for boys and girls :) Happy Crafting!
Subscribe to:
Posts (Atom)