So I saw this banner online and figured "I can make that!" I made it to a size that would work for me, so you could do it as you would like it. I actually have no idea how big or small the banner I saw online was.
The first thing I did was make a template. I used a standard 8.5x11 piece of paper and folded it into a triangle. I left about an inch at the bottom so I could stitch it together.
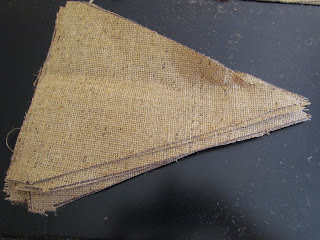
I outlined the pieces onto the burlap.
Then I cut them all out. Cut as many triangles as letters you need.
Since I am using a fall theme I wanted to do orange and black letters. I did every other and just made a list of which letters where which color. The paint dried very quickly on the burlap which I loved b/c I could do the whole project pretty quickly.
I attached my words to a piece of twine. I pinned them together and folded the top of them over the twine and sewed it all down the line. I did not stitch through the twine, the letters will move around. Also, when you cut your twine, cut it for where you want to hang the banner instead of for the word.
I made a Thanksgiving banner too, so when Halloween is over I can just take the bottom part down and put up thanksgiving. I think it looks nice and was a quick and fun holiday decoration to make.


You know I actually love burlap.....been trying to figure out if I can do curtains for the kitchen with burlap that would actually look really good, might do this idea for Thanksgiving(dont have alot of decorations for that holiday)
ReplyDelete