Monday, January 23, 2012

Tulle Wreath

It has been far too long since I have blogged!  I have missed posting, but unfortunately with a new baby extra time is something that I do not find often.  Hopefully I will be able to get on here and catch up on the posts I have been meaning to get on here fora couple months now.

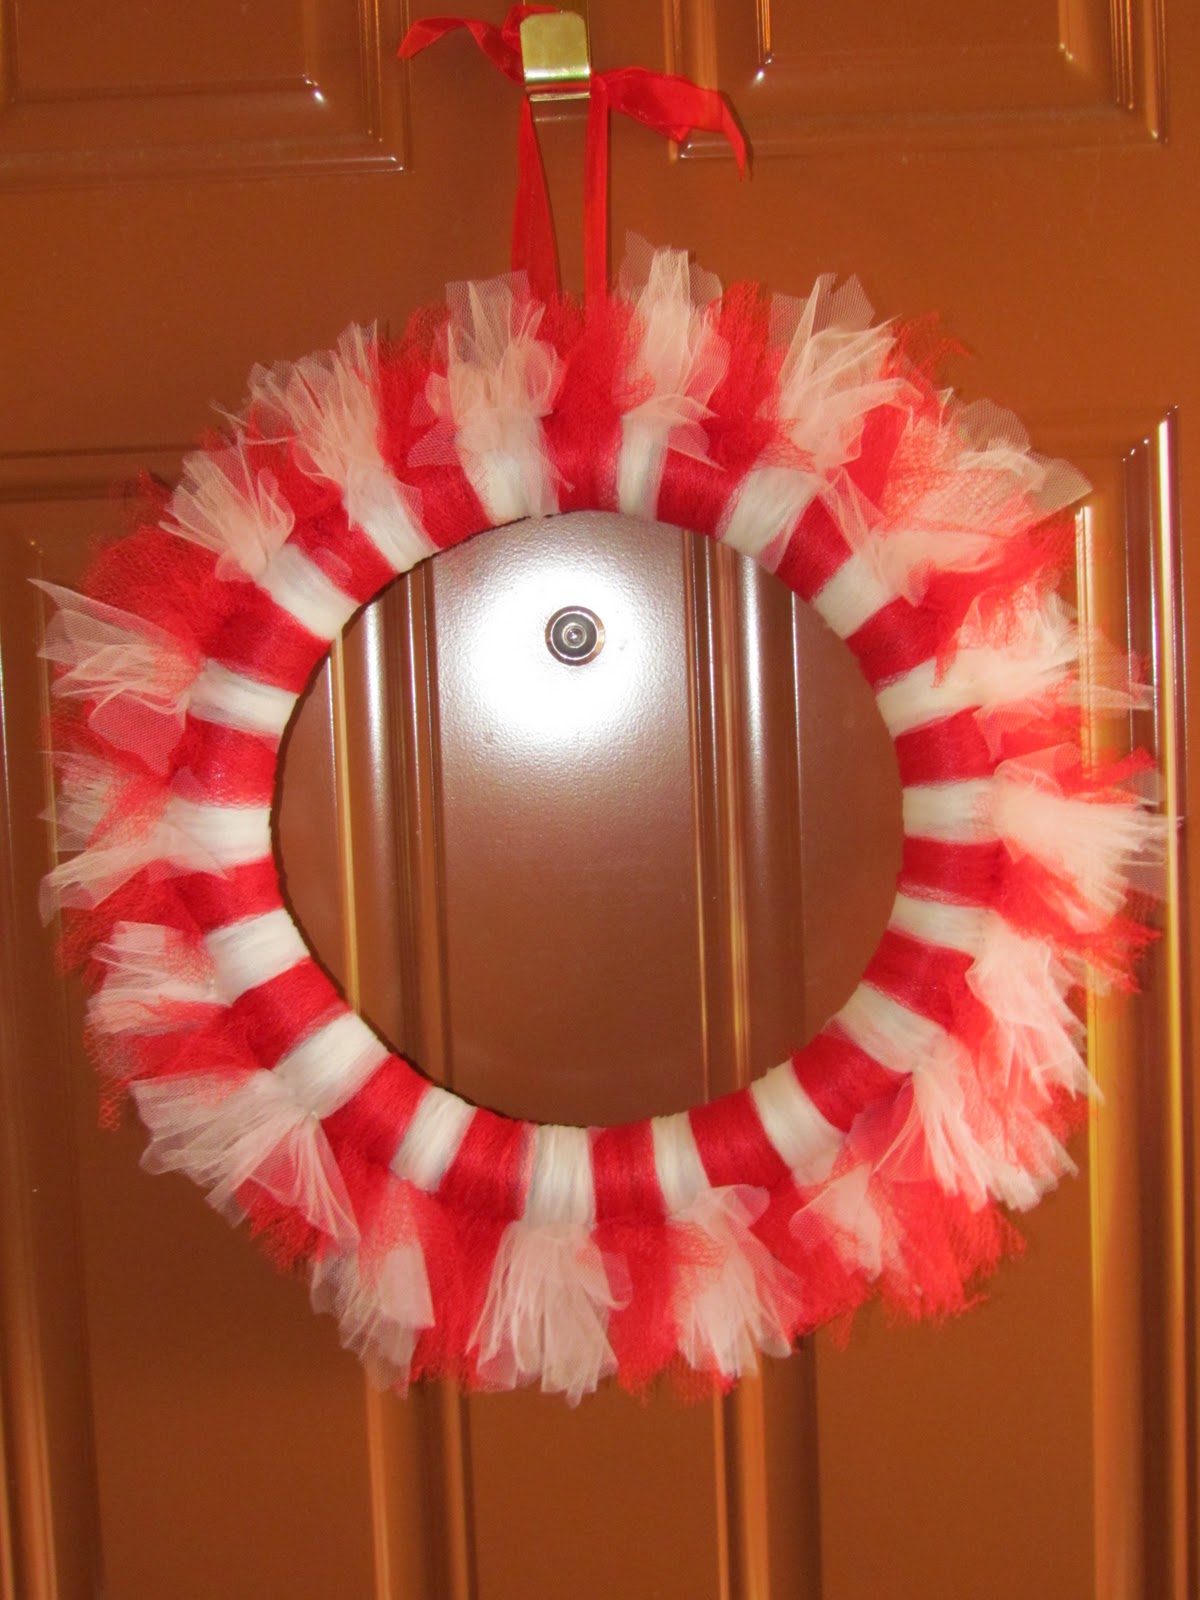
BUT today I'm going to share a Tulle Wreath that I made.  I've been seeing these all over pinterest and just happened to have some extra white and red tulle.  With Valentines day right around the corner it seemed meant to be!  So I figured I'd just jump in and see how it went :)


To get started take your tulle and cut it into strips.  I did not measure, But mine are roughtly 3"x8"  I just cut them long enough to go around the wreath and tie and have excess sticking out... I did 3" but you could do wider or even less wide.. just cut a few sizes and see which works best for the look you are going for...  If you have different colors separate them, b/c these crazy things will end up all over if you dont have them group together somehow.

Gather the tulle and wrap around the wreath. 

Tie in a secure knot.  This is nothing special, just a knot.

Repeat this process OVER AND OVER AND OVER.  Make sure you get them as close to each other as possible.  For demonstration I tied this one further apart and pushed it close.  You can do that, but I have found it is easier and looks better if you just try to tie them close in the first place.

I added a ribbon to hang it with.  To do this I laid the ribbon on the wreath and tied the tulle over the top of it.  You could try to slide it under if you forgot, but putting it down first is much easier.  Push it up close to your excess tulle so it blends in a bit.

Go around the excess with your finger and press to get them as in line as you can.  They dont have to be perfect, but you do want them to line up some so it looks nice.
After you do this you can trim it all to be the same length.  I sort of like the different length look, but I had differences up to an inch (Probably an argument for why you should measure your strips instead of just cutting). So I cut them to make them look close to the same length.

Hang and Enjoy.  As I said earlier this one was for Valentines day so I thought Red and white would look good.  As I was making this I was thinking that I should have used blue tulle for the upper left area and make it look like a flag for the fourth of July.  The possibilities are really endless, christmas colors, halloween, etc etc.  Be creative and have fun.  This literally took me an hour or so to make from start to finish.  Definitely one you can do while sitting in front of the TV.

This is what it looks like with the ribbon hanging it.  You could shorten the ribbon to so it was not as obvious.  Be creative and make it your own :)  Happy Crafting!

Tuesday, December 6, 2011

Saturday, October 29, 2011

Frame Hanging Tip

I found this on another blog and had to share.  Please click here to find out how to hang a frame with much less hassle!!

Wednesday, October 19, 2011

Bottle Vase

I've been loving that it is fall and decorating for it.  Once I got all of my fall decorations out I realized that I had room for some more.  I hate spending tons of money on decorations that are only out for a couple of months, so I figured I would just ignore my need for them.  Then when I was looking online I saw wine bottles wrapped in yarn.  They were very pretty, and the wheels started turning.  I dont have yarn, but I have twine.  So I started playing with the bottle.  I didnt have enough twine on hand to cover the entire bottle, so I thought some more.  I had left over burlap from my banners.  YAY!

So this is what I used:
  An empty cooking wine bottle.
A piece of burlap that was as tall as the flat part of the bottle, and could wrap around it twice. 
Twine or yarn
Hot Glue Gun and Scissors

Make a verticle line with your hot glue on your bottle and start wrapping the burlap around it.  When finished add more hot glue to secure the burlap.

This is what your bottle will look like. 

Now put some glue around the top of the bottle and start wrapping the twine around it.  You either need to put very little glue or wrap fast b/c the glue dries fast.

Wrap the twine around until it meets the burlap.  I wrapped it around about four more times after it met with the burlap.  It will look like the above picture.  Now you could be done here if you wanted, but I thought it looked off balance, so I wanted to add more twine.

Glue and wrap around the bottom of the bottle again.  Go up as high as you think looks good.  I just eye balled it and glue it all in place.  This is your finished piece!
You can use different bottles of sizes and different materials.  I thing it looks really nice and I would probably pay money for it in a store, but what I love best is that I used things that I had laying around, so there was no shopping or buying.  Here is another style I did:


Thursday, October 13, 2011

Halloween Decorations

Its that time of year again and I couldnt be more excited!  Since Alison has been born we just have not  had the opportunity to decorate for Halloween.  We lived in an apartment for the first two years, and then last year we had just moved here.  So this year I decided it was time to decorate.  Now I tried to do decorations that she and I could do together.  Her and I both had fun with decorating.  We still need to carve pumpkins, but that will not happen for another week or two.  I'll update pictures if I change anything.  But I am pretty happy with these for now.  Its not over the top but its fun :)

I created spiderwebs at our enterance with white yarn.  It went together really easily and was fun to be creative on how to make.

This is a wreath that Alison and I both made.  There is no tutorial needed, we simply used a wreath form (made one from plumbling insulation from lowes) and then shiney halloween garland we bought at the dollar store.  The sign was also from the dollar store, so we just wrapped the garland around and attached the sign.  It was a great craft that Alison could help with a lot. 

I made another spider web around our front windows to add a bit to the Ghosts that we had already made.  I added some bones and pumpkins too.  I am thinking maybe if we get a chance we'll make some tombstones, or that could be a project for next year.

We had to make sure some ghosts were in our tree :)

The Burlap Banner was the only decoration I did myself. 

Halloween is a fun holiday for me, I think its definitely one that is most fun when the decorating is done with the kids, they are the ones that enjoy it the most too.  It will be interesting to see how our decorations change as the kids get older and are able to do more difficult crafts :)

Tuesday, October 11, 2011

Burlap Banner

So I saw this banner online and figured "I can make that!"  I made it to a size that would work for me, so you could do it as you would like it.  I actually have no idea how big or small the banner I saw online was.
The first thing I did was make a template.  I used a standard 8.5x11 piece of paper and folded it into a triangle.  I left about an inch at the bottom so I could stitch it together.

I outlined the pieces onto the burlap.

Then I cut them all out.  Cut as many triangles as letters you need.

Since I am using a fall theme I wanted to do orange and black letters.  I did every other and just made a list of which letters where which color.  The paint dried very quickly on the burlap which I loved b/c I could do the whole project pretty quickly.

I attached my words to a piece of twine.  I pinned them together and folded the top of them over the twine and sewed it all down the line.  I did not stitch through the twine, the letters will move around.  Also, when you cut your twine, cut it for where you want to hang the banner instead of for the word.

I made a Thanksgiving banner too, so when Halloween is over I can just take the bottom part down and put up thanksgiving.  I think it looks nice and was a quick and fun holiday decoration to make.

Hanging Ghosts

I am so excited about the holidays this year.  Not only is baby Lexi here, but Alison is about to turn four and is really understanding the holidays, which means more fun for me!  I wanted to decorate for Halloween this year, and not wait until the day of.  I also wanted to do it for very cheap and have Alison be involved.  So I did some brainstorming and decided on these ghosts.

First I took a white sheet and ripped it into rectangles (could also do squares or cut circles if you really wanted to be fancy).  Then you take two plastic bags that you get from the grocery and wad them into a ball.  Place the plastic bags into the center of your fabric.

Now when you pick up your fabric by the bags you will see your ghost start to form.

I used a heavy quilting thread.  You could use yarn or whatever you wanted to as long as it was strong enough nto to just break.  You simply tie around under the bags in order to make the head and to keep the bags from falling out and the fabric from falling off.

To hang them, use the same thread and just do one stitch through the top. 

Knot the end and you are ready to hang.

You can hang them just about anywhere, we put a few in our tree.

And the rest on the front of the house.  It was a fun project that Alison and I could do together and that did not cost a lot and we had everything on hand.